
Rooting is the way to obtain Supersu Right’s on a Android device, that means after Rooting the Phone you have (sudo) full Right to perform any system task.after rooting the phone you can replace any system app & settings, you can run any specialized app that require administrator or sudo right.. if you own a android smartphone and want to root it then you can do it by following below Instructions..
Requirement:
- vbmeta.img
- unlock bootloader by following this guide
- ROM2box and required USB driver: Download
Note:
- all userdata will be erased, must make a backup before process
- Must write vbmeta.img after unlocking bootloader
- if the device has a vendor_boot partition patch & flash it too
- we strongly suggest below method (boot.img dump) because boot.img from a different firmware version may cause bootloop
- the boot image is NOT the bootloader image. do not confuse between them flashing the wrong image to bootloader could brick your device
How to Root Doogee S41 Pro using Magisk:
- Install USBDK and Mediatek driver on Your computer
- Download & Extract ROM2box
- Run ROM2Box.exe
- Click Mediatek/Firmware Reader!
- mark “Full Firmware”
- click ‘START’ button
- Once the process Started, turn Phone OFF, Now together Press Volume up + down key & Insert USB, Once Phone detected Immediate Release key (make sure your phone stable in device manager)
- done, it will take 15-20Min
- Move boot.bin or boot_a.bin (rename it boot.img) from ROM2box/out folder to your phone
Note: if you wish to skip above steps then copy boot.img from stock firmware instead dump (make sure it’s from Installed firmware version)
- on Phone Install Magisk Manager
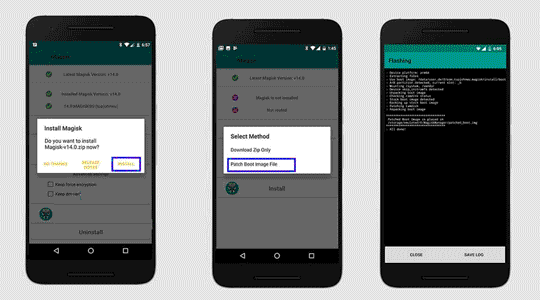
- Now patch boot.img using Magisk
- Download this root.zip & extract it
- Move patched_boot.img (rename boot.img) and vbmeta.img to root folder
- run root.bat & connect phone in fastboot mod
- wait until Success !
done, Your phone successfully rooted.
Related: