twrp Root Blackview R6 Lite-
Root twrp Recovery for Blackview R6 Lite is Here, in the article you Will Learn How to Install twrp Recovery and Root Blackview R6 Lite. Rooting is the way to obtain Supersu Right’s on Android Devices, that means after Rooting the Phone You can unlock All features of the Device and you have Full Permission to Play with it. means you can Install custom ROM, Install Custom Mod’s and tweak your phone using various tricks. Rooting also Best way to Save battery because after Rooting you can Disable all Apps In Single Click and also you have Right to Remove Pre-Installed system app so you can Easily Uninstall Non Require System apps. follow below Guide to Install twrp Recovery and Root Blackview R6 Lite.
Note-
1. This is a unique Guide which is work on almost all Asus Devices.
2. Flashing The ROM will erase all your Data with official Rom, So create a backup of your personal data before Flashing, if possible.
3. Please Do carefully, We are not Responsible for any damage, bootloop, or dead SD card’s.
4. Ensure that your Device atleast 50% charge During Flashing Process,to Stop the Accidentally Switch off.
5.Follow all steps correctly otherwise it cause bootloop.
6. Must backup NVRAM using this Guide before Doing anything.
Guide detail:
| Status | Working |
| Based on | Magisk |
| twrp | Not available [12/27/2017] |
| Release | Initial |
| Require | Stock boot.img [Firmware] |
Require tools and Files-
| File Name | Download |
| XN Rootikit | Download |
| adb Folder | Download |
| adb fastboot Driver | Download |
| Magisk Manager | Download |
| twrp /Porter Dev only | Download |
How to Install twrp Recovery on Blackview R6 Lite-
Not available at this time use twrp Porter to Port Self. or wait some time while we Port for this Device. twrp porter
How to Root Blackview R6 Lite-
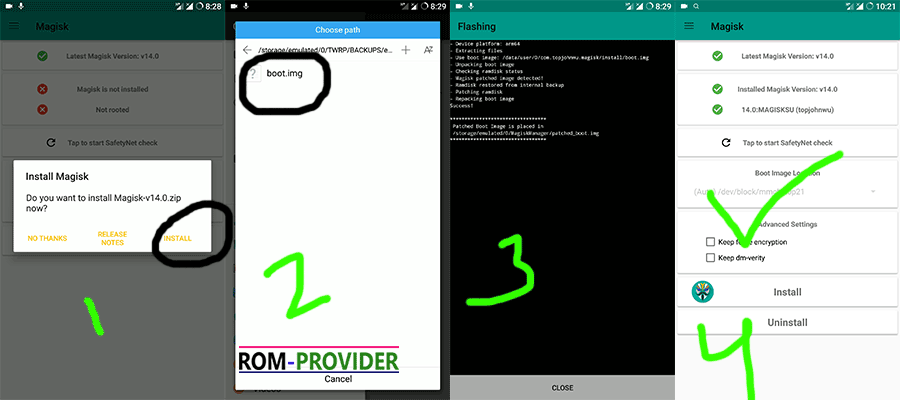
Step 1 First of all we need stock boot and Recovery images so take from Stock ROM or Follow this Guide to backup unRooted Stock ROM Here
or Here is Official Firmware first flash it then take boot.img file Here
Step 2. Download adb folder From above and Fastboot driver Installer From above.
Step 4. then follow Bellow Instructions, Be Remember Bootloader Must Unlocked [use provided toolkit to unlock].
Step 5. Go to Setting>about Phone>type 7 time Build number > Back>Developer Option and Enable Device Debugging And Oem Unlock.
Step 6. Run Toolkit exe File then Follow on Screen Instructions to unlock bootloader, create a Rooted boot.img and then Flash this Rooted boot.img
Follow Video guide- Here
Note- if we provide toolkit then Run toolkit exe and follow on Screen instructions.
Related articles
1, How to Flash Official Firmware on Vivo With QCOM-DLoader.
2. How to Disbale Boot verification using No verity Disbaler.
3. How to Repair IMEI Number on Qualcomm Phone [Easy Method]
4. How to Install Xposed framework on any Android Device [also Nougat]
5. How to Root without PC [Easy method]
6. How to backup NVRAM aka IMEI Number [Easy method Mediatek]


