
Convert Your Chines Redmi Note 12 Pro from a regional variant to a Global variant. it is a complex process that requires some technical expertise. It involves modifying the firmware of your Android device to remove region-specific limitations and enable support for global network bands. you can use the existing global firmware to convert your Chines Redmi Note 12 Pro Into a Global Version.
Redmi Note 12 Pro Smartphone Run on Android 12 & it is Powered by Mediatek dimensity 1080 Processor. the device come with 6GB of RAM and 128GB of Storage. it is a dual SIM smartphone support nano sim cards. Connectivity Option’s Include GPS, Wi-Fi, hotspot & bluetooth 4G & 5G.
Why Convert:
1. Access to Google Play Store and Google Services:
- One of the significant advantages of converting from the Chinese version to the global version is gaining access to the Google Play Store and Google Mobile Services (GMS).
2. Multi-Language Support:
- Global versions of smartphones typically offer support for a wide range of languages, catering to users from diverse linguistic backgrounds.
3. Compatibility with Global Networks:
- Converting to the global version often means ensuring compatibility with a wider range of cellular networks and bands used internationally.
4. Firmware Updates and Support:
- Global versions of smartphones usually receive firmware updates and support tailored to international users.
Requirement’s
- QLMFlasher: Download
- Redmi Note 12 Pro convert file
- Mediatek USB Driver: Download
- Contact Me for region change, Covert Global, unbrick, frp & unlock >>
Steps to Convert Redmi Note 12 Pro into Global Version
- Unpack Convert File: after Downloading the convert firmware from above links extract the zip file using 7z.
- Install Mediatek VCOM Driver: Install Mediatek driver on your computer which make a communication between your system and the device you are flashing.
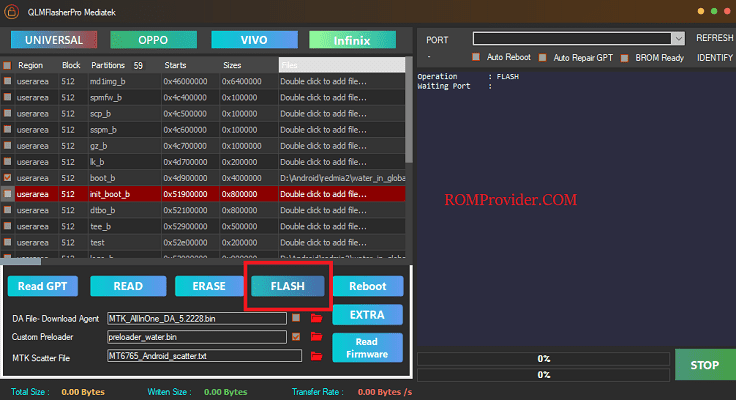
- Run QLMFlasherPro: Enter the qlmflasher folder and run the QLMFlasherPro.EXE.
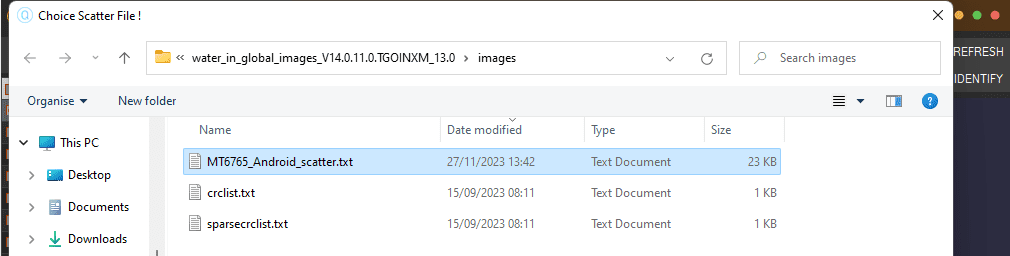
- Select Scatter File: In the QLMFlasher Click Mediatek, click ‘choose’ in front of MTK scatter file & in the Popup windows select scatter file from ROM folder
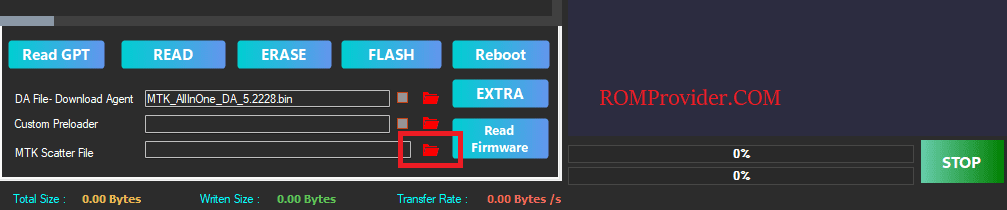
- Initiate Download: Now final Step, Click ‘FLASH‘ button to start the flashing process
- Connect Device: Switch off Phone, hold Volume up Down button & Connect device to computer using USB Cable
- Flashing Progress: once the flashing process started, monitor the flashing process by watching it, Once flashing done, disconnect device, it will start automatically
- Setup Device: once the device start successfully setup it by following the screen instructions.
Related: