Rooting on Mobicel IX Plus refer to the gaining administrative access the operating system of the device, it enables users to make adjustments & changes that are not possible with standard user privileges. although rooting can provide users a great deal of flexibility and control over their devices, there are certain risk involved, including the possibility of voiding the device’s warranty.
Mobicel IX Plus Run on Android 13 & it is Powered by Mediatek G70 Processor. the device come with 4GB of RAM and 128GB of Storage. it is a dual sim smartphone support nano sim cards.
Note:
- do at own risk
- it will void your device warranty
- all userdata will be erased, Must make a backup before process
- Contact Me for root, region change, unbrick, frp & unlock >>
Requirements:
- Magisk manager
- unlock bootloader by following this guide or official Method
How to Root Mobicel IX Plus using Magisk:
Backup and Move Boot.img:
- Download ROM2box & backup boot.img from phone
- Move the backuped boot.img from the firmware folder to your phone.
Install Magisk Manager:
- Install Magisk Manager on your Mobicel IX Plus
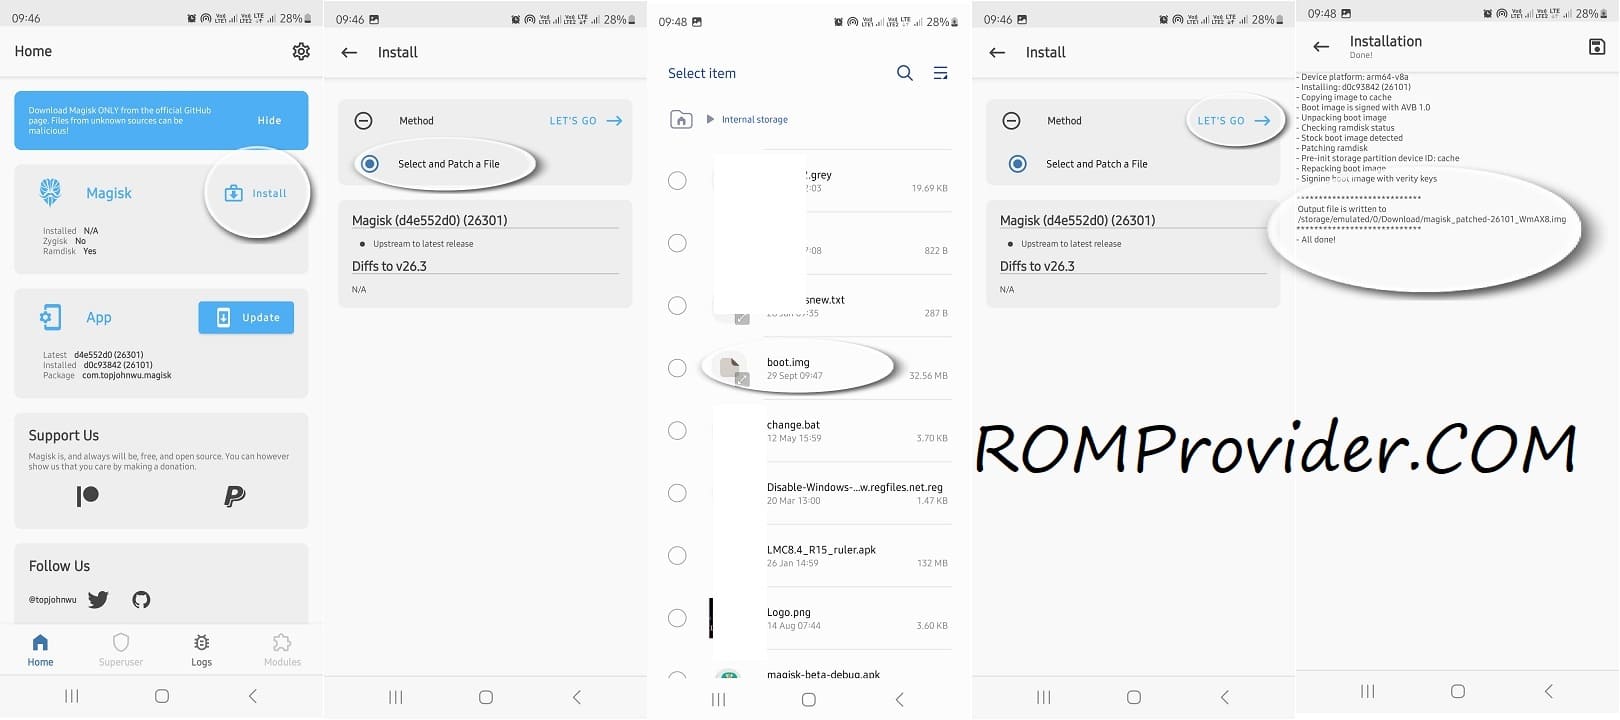
Patch the boot.img:
- Launch Magisk Manager.
- Click ‘Install’ and choose the patch file.
- Locate the boot.img and initiate the patching process.
Transfer Patched File to PC: Once the patching is complete, move the patched file to PC > Storage/Download/Magisk-patched.img.
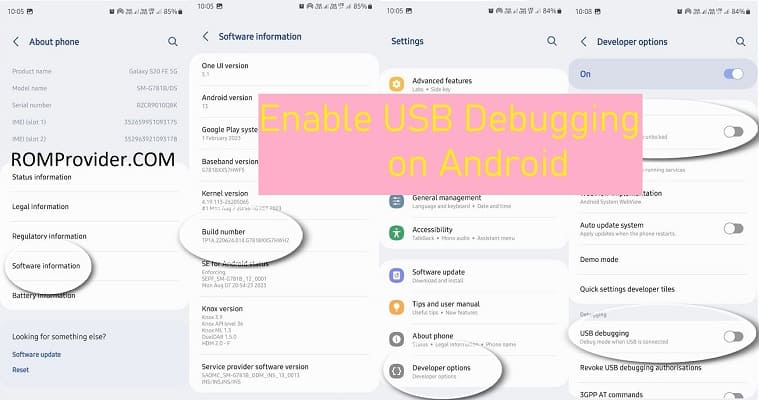
Enable USB Debugging and OEM Unlock:
- On your phone, enable USB debugging and OEM unlock from the Developer Options.
Connect Phone to Computer in Bootloader Mode:
- Connect your phone to the computer in bootloader mode.
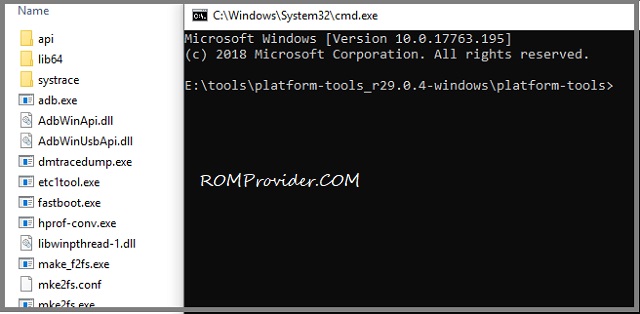
Execute Commands in CMD:
- Open the command prompt in the platform tool folder
- enter below command to flash rooted file:
fastboot flash boot 'filename'
Reboot Your Phone: after flashing, reboot your Mobicel IX Plus by sending below command
fastboot reboot
Completion:
Congratulations! Your Mobicel IX Plus is now successfully rooted.
Related:


