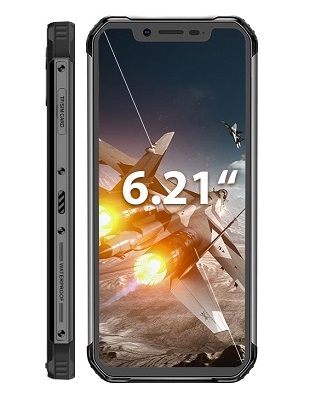
Android 9.0 Pie Resurrection Remix v7.0 For Blackview BV9500 Pro:
Download & Install Resurrection Remix v7.0 Custom ROM on Blackview BV9500 Pro. If you own Blackview BV9500 Pro Smartphone then You can Install Resurrection Remix v7.0 on it. This is Not a Device based Port it’s a GSI image Can be Flashed Via Fastboot and twrp. You Can Follow bellow Instructions to Install Resurrection Remix v7.0 on Blackview BV9500 Pro.
The Blackview BV9500 Pro Smartphone is Come with Android 8.1 OS which Is Powered by Mediatek MT6763 Processor. the Device Come with 6GB of RAM and 128GB of Storage Can Be Expandable via SD card.
Note:
- unlocking The bootloader Will Erase All Your Data So First Make a Backup before Process.
- Make Sure Your Phone at Least 50% Charge to Prevent accidental Shut Down.
- GSI Image’s are in Beta So Not 100% Work on Many Devices So if it not Work on Your Phone Please Re-flash Stock Firmware to Recover.
Download:
- Platform tools Here
- Resurrection Remix v7.0 Blackview BV9500 Pro [A only arm64] Here
- Root Your phone using This Guide:Here
Working:
- boot
- SIM
- WiFi
- hotspot
- GPS
- Gesture
Know issue:
- VoLTE
How to Install Resurrection Remix v7.0 on Blackview BV9500 Pro:
- Download & Extract Platform tools inside a Folder
- Download and Extract ROM file in platform tools folder
- on Phone Enable usb Debugging and oem unlock From Developers Option
- Connect Phone to PC With usb. & then use BElow code to Perform target action.
type below code to reboot Phone in bootloader
adb reboot bootloader
type below code to unlock bootloader & Flash android 9.0
fastboot flashing unlock
fastboot erase userdata
fastboot erase system.img
fastboot flash system system.img
then type below code to reboot
fastboot reboot
Done. Android 9.0 Pie now Installed.
Install With twrp:
- Download ROM File From above and Move it to Device Storage
- Reboot Phone to twrp and Click on backup create a nandroid backup
- Click on Install then Select Install image Navigate System.img file
- From the Next Screen Select install as System partition. and Swipe Slider
- Wait until Installation Complete. Go back and Reboot System Now.


Hi, I tried to install this rom, but I don´t know what I’m doing wrong because ir doesn’t work to me…
First: I suposse I must change the name of the image file for System.img. Am I right??
Second: In the next screen I have to choose the partition, I don’t have a System partition, instead I have a System Image, so I clicked this… Then I can see some kind of instalation, the cellphone said something like loading files, then writing, and so on…
Third: Finally, appaers the message done, but when I rebooted the system the cellphone stay in bootloader, and nothing more. I can´t enter to the system and I had to wipe everything.
I did it twice, and the same.
Can you help me please? I want to change my rom because in Android 8.1 I can’t change the APN settings, and I can’t use my mobile data… pfffff!
Thanks a lot!
K.
reboot phone to bootloader, wipe data and Flash system with platform tools then it will bootup
use code:
fastboot erase userdatafastboot flash system system.img
Hey guys, I followed your tutorial and I’m stuck. First of all, the only img witch started was the AOSP Android 9.0 Pie. All the other stuck on boot logo. Now this one just starts once, when I restart I stuck on boot logo again:-( Only way to get it running once is with fastboot. If I go in to recovery after flashing the system wit fastboot, twrp isn’t persistent and cant do any tasks because /data is not mountabel (error: could not mount /data and unable to find crypto footer.)
Now since I know how smoot android 9 would be I don’t want to go back. Pleas help me.
Thanks Sturmkater
Send Cammand
fastboot format userdatafastboot Reboot