
Fix bootloader unlock Warning on Samsung SM-A202FD:
Step by Step Guide to Fix bootloader unlocked warning on Samsung SM-A202FD, Here We Share a Fully tested Guide to Fix unlocked Warning on Samsung SM-A202FD by using the odin.
Samsung SM-A202FD Run on Android 9.0 OS Which is Powered by Exynos 7884 Processor. it is a Dual SIM Smartphone accept Nano SIM Card. The Device Come with 3GB of RAM and 32GB of internal Storage Can be expandable via SD Card.
Steps to Remove bootloader unlocked Warning on Samsung SM-A202FD:
- Download the Correct Firmware For Your Device.
- Extract the Firmware
- Extract BL File Ex: BL_A205GUBU2ASF2_CL16214341_QB24234542_REV00_user_ low_ship.tar.md5
- Extract the Param.bin.lz4 file WITH 7-ZIP EXTRACTOR
- Open the param.bin.lz4 file WITH 7-ZIP EXTRACTOR and Extract the param.bin file
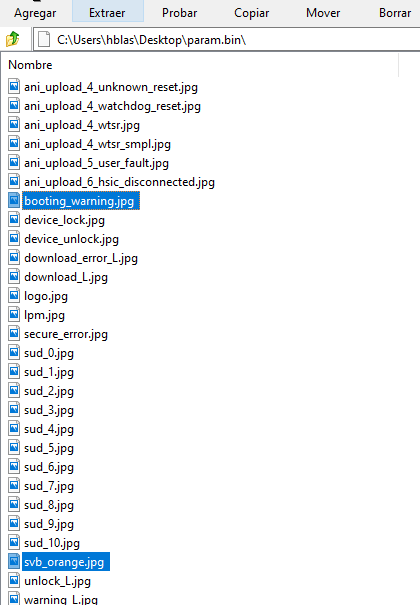
- Extract param.bin WITH 7-ZIP EXTRACTOR. Here some Images are Extracted in a folder.
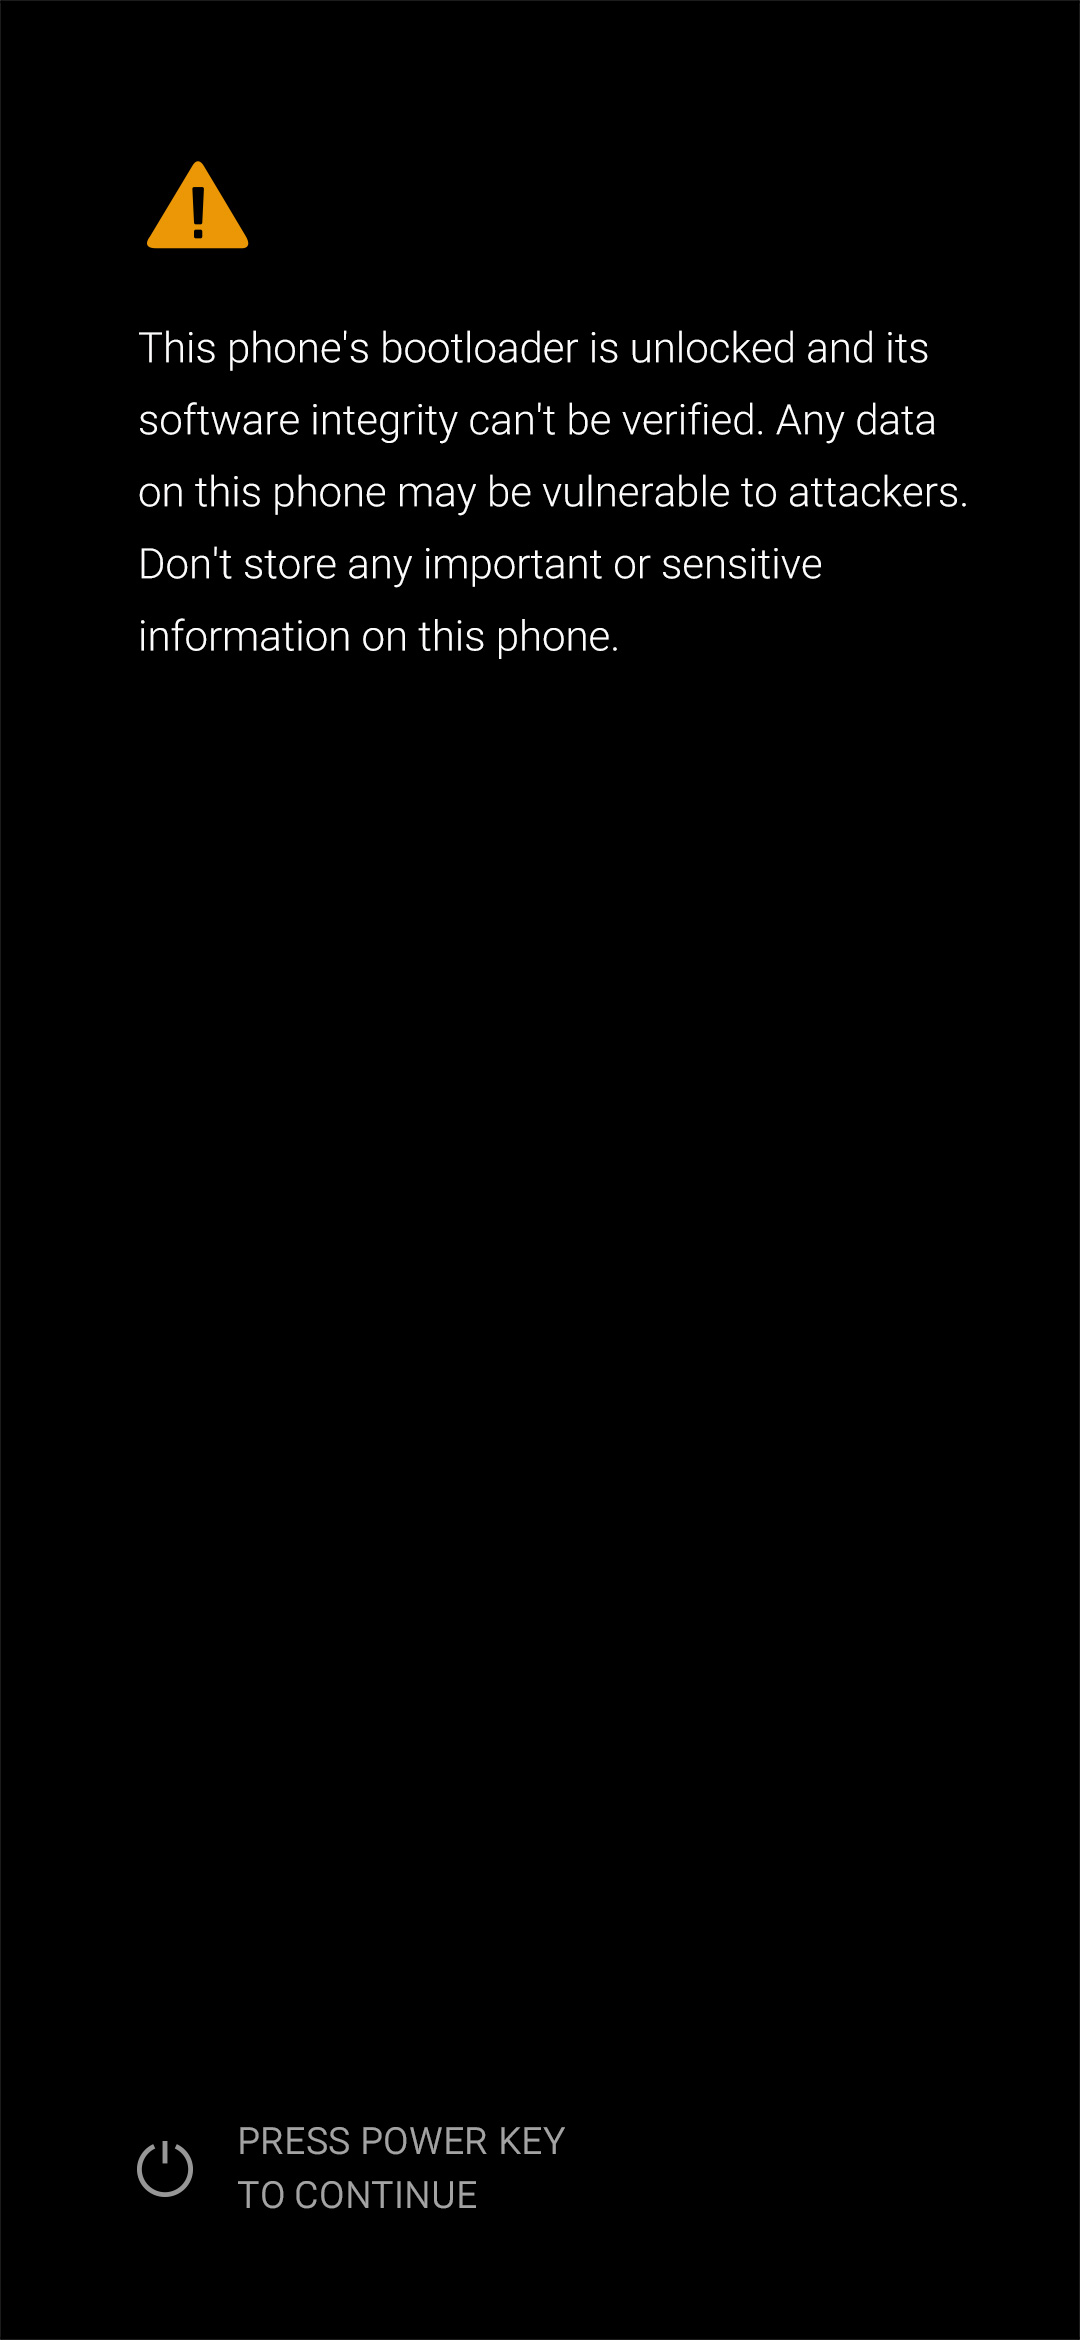
- Look for the jpg image: booting_warning (contains the yellow triangle image and red bootloader unlock warning text). We will replace this image later with a black one. Attached file 870 x 473 Pixels:
- OPTIONAL: The svb_orange.jpg file (1080 x 2340 pixels) contains the warning message with the option that says PRESS POWER KEY TO CONTINUE. If you want you can change it to an image identical to the boot or leave it unmodified. In my case I changed to another image in which I added the google logo:
- Open param.bin With 7-zip and replace booting_warning.jpg and svb_orange.jpg (optional) by dragging the files into the window.
- Close 7-zip, Now You have Modified Param.bin.
- Convert param.bin to TAR format to flash with ODIN: Select param.bin, right click, choose 7-zip ZS, then add to the file, finally click on file format and change to tar. Accept (OK) and ready we will have the param.tar file ready for ODIN.
- Run odin tools. under AP Section Load Param.tar File From Extracted Folder

- Reboot Phone to Download Mod and Connect to PC
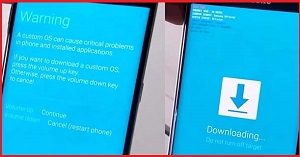
- on Odin Check Auto Reboot and Click Start. that’s it! Wait until Success.