RockChip Flash Tools are an official suite of utility programs engineered specifically to service, upgrade, and repair consumer electronic devices running on Rockchip (RK) processors. These chipsets power millions of Android TV boxes, tablets, smart home equipment, and single-board computers (including the RK3229, RK3328, RK3288, RK3399, and newer chips).
The flagship application in this suite, AndroidTool (formerly known as the RockChip Batch Tool / ROM Upgrade Tool), provides complete low-level storage communication. It allows professional technicians and advanced users to overwrite system sectors, install custom factory ROMs, and unbrick devices that are completely unresponsive.
📥 Direct Download Section (All Stable Formats)
Get the official portable utility files from our high-speed, direct repository below.
| Software Utility Module Name | Release Build | Direct Download Link |
| AndroidTool Release (Recommended) | v3.30 Build | 📂 Download AndroidTool v.3.30 Now |
| AndroidTool Release (Recommended) | v2.42 Build | 📂 Download AndroidTool v2.42 Now |
| Rockchip DriverAssistant | Rockchip USB Drivers | 📂 Download Rockchip DriverAssistant |
Technical Specifications & Server Note:
-
File Structure: 100% Portable ZIP Archive (No complex installation required).
-
Supported OS: Windows 7, 8, 10, 11 (32-bit & 64-bit).
-
Prerequisites: Ensure your device is charged and you have a high-quality USB data cable.
Key Components of the Rockchip Service Suite
-
AndroidTool (Batch Tool): The primary production-grade environment. It allows mass or individual loading of official firmware files onto target chipsets, handling system restorations seamlessly.
-
Factory Tool Engine: A specialized developer module designed to configure raw memory block parameters, structure partition boundaries, and compile custom structural images.
-
Upgrade Tool Engine: A consumer-facing module optimized to safely flash sequential OTA delta updates or official stock software upgrades without deleting local system parameters.
How to Setup RockChip Flash Tools
Because the RockChip utility runs as a fully portable script layout, getting it ready on your Windows PC is simple:
-
Download the AndroidTool Release v2.58 ZIP archive from our download block above.
-
Extract the file contents directly into a folder on your drive (e.g.,
C:\RockchipTool\) using WinRAR or 7-Zip. -
Download and run the Rockchip DriverAssistant tool to install the necessary low-level USB drivers. This ensures Windows can communicate with your device during the boot transfer state.
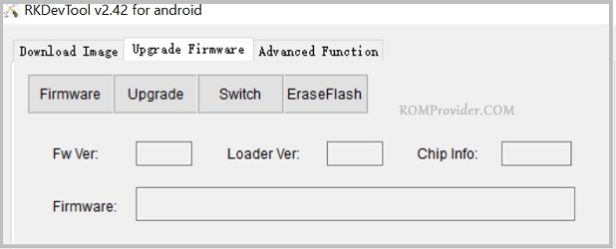
How to Use AndroidTool to Flash Stock Firmware
Follow these exact operational steps to install your factory software firmware .img file:
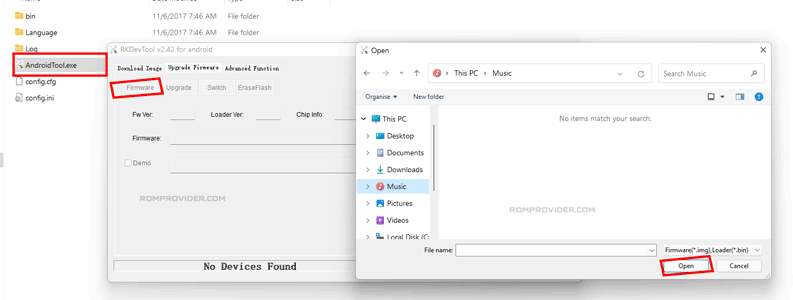
Step 1: Open the Utility Manager
-
Access your extracted program folder.
-
Locate
AndroidTool.exe, right-click the file icon, and select Run as Administrator. -
The graphical user interface panel will open, initially displaying a status string at the bottom reading “No Devices Found”.
Step 2: Load Your Factory Firmware Package
-
Click on the Upgrade Firmware tab options page located at the top menu strip.
-
Click the large Firmware selector button inside the control pane.
-
A file browser window will pop up. Navigate to your local computer storage, locate the specific official
.imgfirmware file built for your device model, and click Open. -
Wait a moment while the engine maps the checksums and prepares the firmware partitions for transmission.
Step 3: Establish Low-Level Connection
-
Turn off your Rockchip device (TV Box/Tablet) completely.
-
Press and hold down the hardware Volume Up + Volume Down keys simultaneously. (Note: On many Android TV Boxes, you must use a toothpick to hold down a hidden electronic recovery button inside the AV Port jack instead).
-
While holding down the boot keys, link your device to the computer using a USB data wire.
-
Watch the status window line at the bottom of the tool monitor. It will instantly change to show “Found One LOADER Device” or “Found One MSC Device”. You can now release the keys.
Step 4: Run the Upgrade Script
-
Click on the Upgrade action button situated on the main utility layout grid.
-
Leave the configuration wire entirely undisturbed. The application log window will scroll as it formats the flash blocks and copies over the new system sectors.
-
Success: Once the process finishes, a confirmation message will display. Safely disconnect the USB cord and turn your newly restored device back on!