RESET FRP on NOKIA 5-
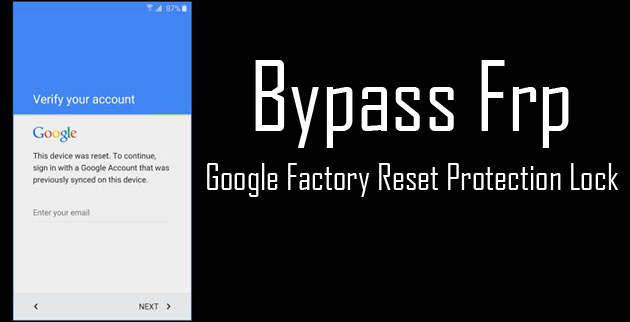
if you own Nokia 5 and has a FRP or Gmail lock issue then this guide is for You. in this article you will learn how to Easily RESET Frp of Nokia 5 this is a Fully Tested working Guide which is tested with android 7.0XX OS.
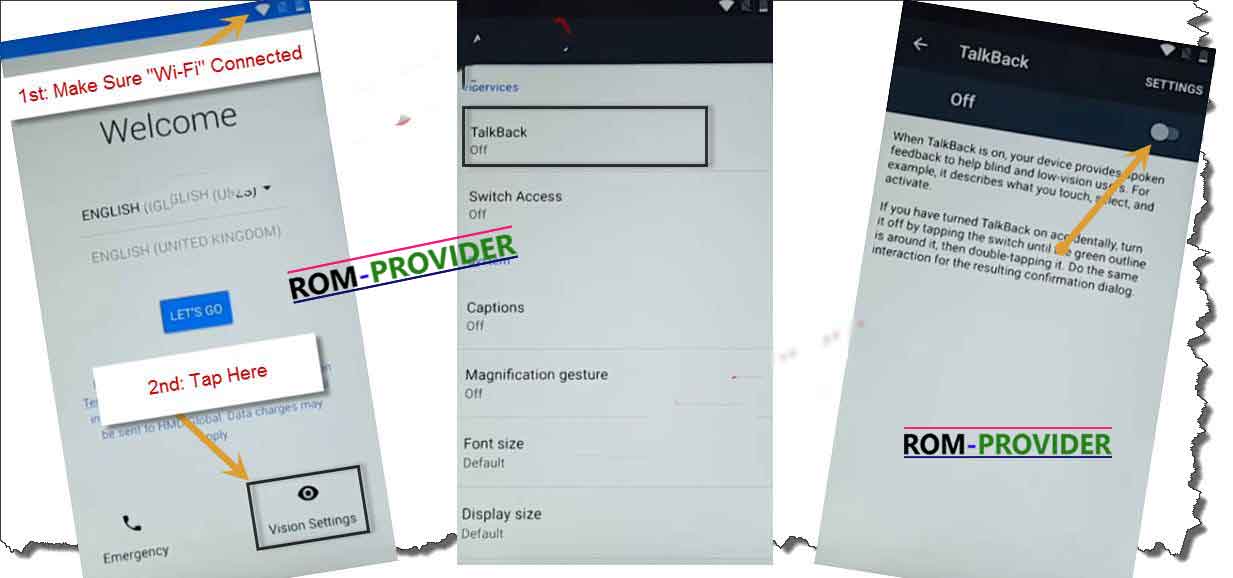
1. From very first “welcome screen” tap on “Lets Go”, then “Skip”, then “Setup As New” after that “Connect Wi-Fi”, and go back to “WELCOME SCREEN AGAIN”.
2. Now tap on “Visiion Settings”, “Talkback”, then Turn on “Talkback”.
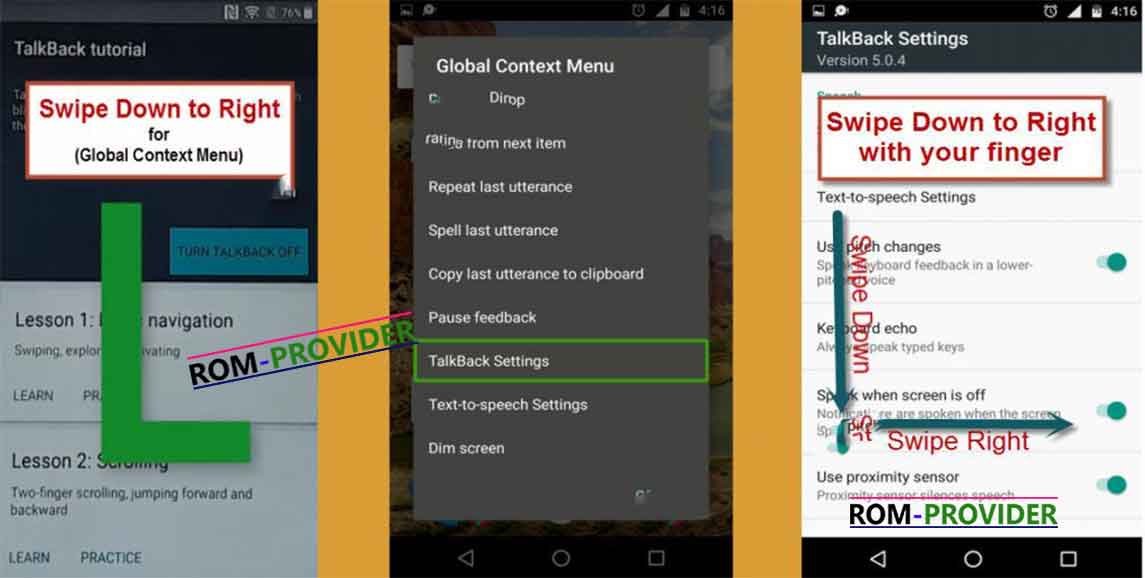
3. Swipe Down to Right to bring “GLOBAL CONTEXT MENU”, double tap on “talkback Settings”, then again ” Swipe Down to Right”, then double tap on “suspend feedback”.
4. Go to “help & feedback”, type there “voice”, then tap on “voice icon”, and then tap on “Get started with Voice Access”.
Let’s Open Youtube:
5. Tap on “youtube video”, then tap on “share arrow”, then “3dots” to share the video.
6. Drag to down youtube video, then tap on “3dots” top right corner, then tap on “settings”, then “About”, then “Google Privacy Policy”.
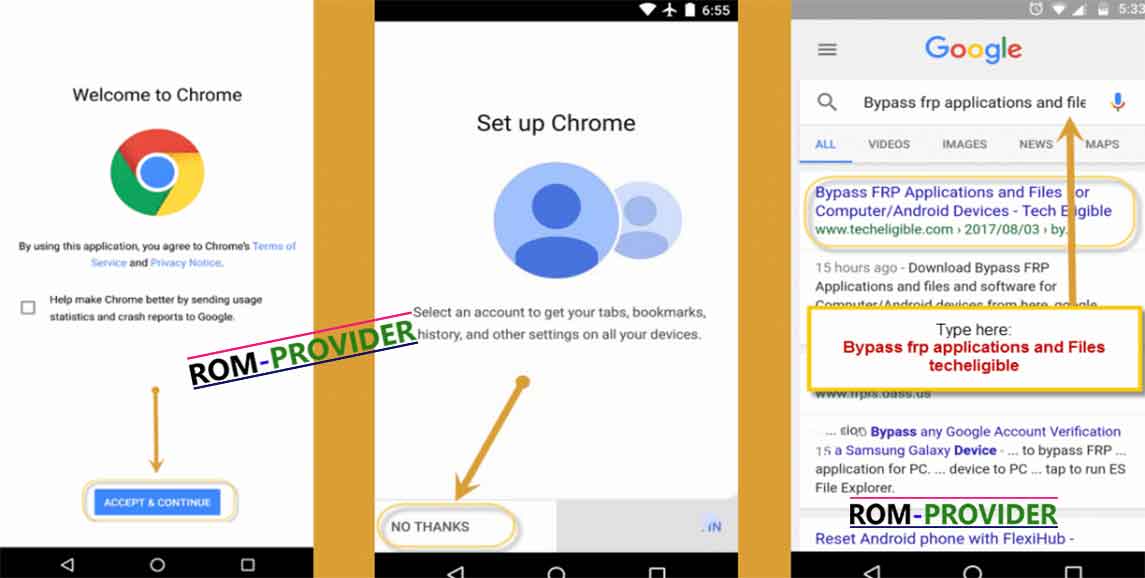
7. Accept & Continue, then “No Thanks”, now chrome opened successfully, just type there “http://bit.ly/2juXku8“
8. Download from there “Development Settings,apk”, and then on download finish, you get popup, tap on “OPEN” from that.
9. install that from there, if you get installation blocked, tap on “settings” from that popup, then “enable unknown sources”, now again go back to download page “http://bit.ly/2juXku8” and download again development settings, and then install it, and open it.
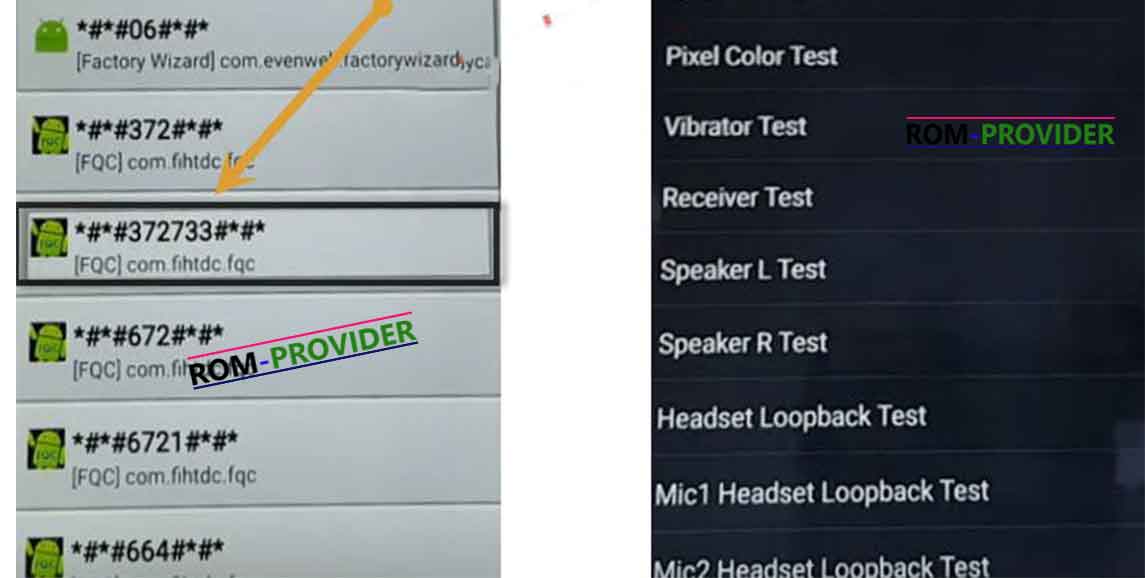
10. Tap on “*#*#372733#*#*” code, and then “FQC” screen will appear.
11. Connect Nokia Smartphone to computer, and then tap on “Receiver Test” from nokia device.
12. Click here to download “Reset FRP nokia Here
14. Extract download file, and go to folder, and right click on “Reset FRP nokia.exe”, and run as administrator.
15. “Allow USB Debugging” from your Nokia device if you get popup.
16. Again close cmd window, and again open “Reset FRP Nokia.exe” as administrator, then press any key from your keyboard to bypass frp.
17. Remove usb cable, and then tap on “YES” from test passed popup on your screen, then switch of your device by pressing “Volume Up + Power” keys together.
18. Now switch on your device, if you get popup window of “Talkback”, just tap on “Exit”.
19. Suspend talkback again, by swipe down to right, then double tap on “Pause feedback”.
20. Go to device “MENU > Settings > Accessibility > Talkback > Turn off talkback.
21. tap on back key, and go to “Accounts” then add latest gmail account there
Related articles-
1, How to Flash Official Firmware on Vivo With QCOM-DLoader.
2. How to Disbale Boot verification using No verity Disbaler.
3. How to Repair IMEI Number on Qualcomm Phone [Easy Method]
4. How to Install Xposed framework on any Android Device [also Nougat]
5. How to Root without PC [Easy method]
6. How to backup NVRAM aka IMEI Number [Easy method Mediatek]

