
Stock Firmware refers to the version of the operating system that comes pre-installed on a device by the manufacturer. It is an unmodified version of the firmware that is distributed with a device and can be used to restore it to its original state.
AGM PAD P1 Stock Firmware is useful for fixing issues such as hang on Logo, Factory Data Reset lock, fastboot Mode, display Blank or white after flash, dead recovery, dead after flash etc. for restoring a device to its original configuration. Stock ROMs are often specific to a particular device and are not interchangeable between different devices.
Firmware Information: |
|
|---|---|
| Device Name | AGM PAD P1 |
| ROM Type | Full ROM |
| SoC | Mediatek |
| OS | Android |
| Password | Null |
| Root Access | No |
| Firmware Version | check below List |
Download Links
Firmware
Flash Tools
- SP Flash tool: Download
- ROM2box Full Free: Download
- Contact Me for Auth, unbrick, Factory Data Reset, Reset, Region Change & root >>
USB Driver
- Mediatek USB Driver: Download
Note:
- Make a backup before process
- it will erase all your data Including Internal storage
How to Install Stock ROM On AGM PAD P1
- Unpack Firmware: after Downloading the firmware from above links extract the zip file using 7z.
- Install Mediatek VCOM Driver: Install Mediatek driver on your computer which make a communication between your system and the device you are flashing.
- Disable SLA Authentication : next you have to disable serial link authentication in order to fix any type of flashing error, you can do it by following this guide
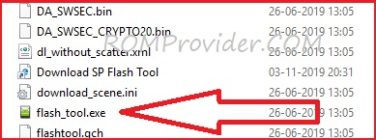
- Run Flash tool: Enter the flash tool folder and run the flash_tool.exe.
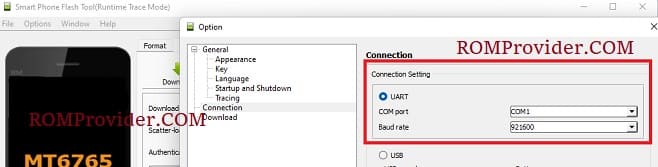
- Connection Configuration – UART 921600: Navigate to the connection settings by clicking option/connection and set the configuration to Bound rate 921600. setup it like the below image
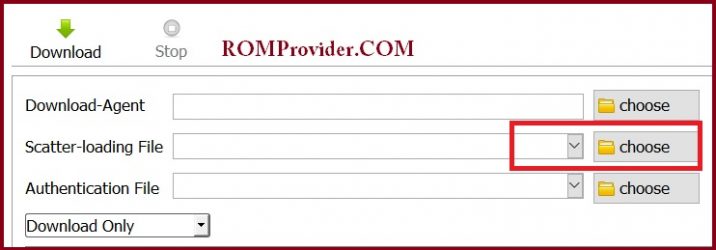
- Select Scatter File: In the Download tab, click ‘choose’ in front of scatter-loading file & in the Popup windows select scatter file from ROM folder
- Select DA and Auth File: repeat the same process and select DA and Auth File from ROM File
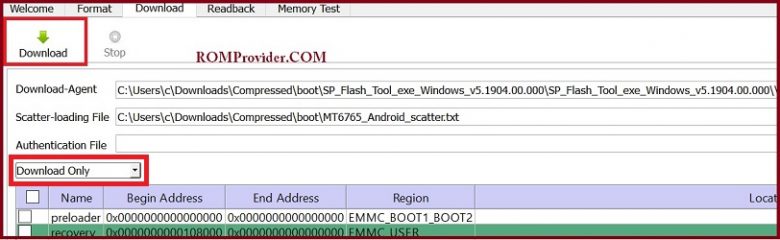
- Download Mode Selection: from the dropdown menu, select ‘Download Only’ option which prevent flash tool to wipe any nvitems.
- Initiate Download: Now final step, Click ‘Download‘ button to start the flashing process
- Connect Device: I am assuming that the device already connected, as we connect it during the SLA Disable Process. if the device not connected, hold volume up down button and connect it (make sure it’s in power off mod)
- Flashing Progress: once the flashing process started, monitor the yellow flashing process by watching it, Once flashing done, disconnect device, it will start automatically

- Setup Device: once the device start successfully setup it by following the screen instructions.
Read also:
- How to Repair Device Network ID (Baseband) Number
- How to restore SP Flash tool Auth
- Download ROM2box Latest Version