PD1803BF_EX_A_1.19.2 Firmware update Vivo Y83:
Download & Install PD1803BF_EX_A_1.19.2 Firmware update For Vivo Y83. If you own Vivo Y83 Smartphone then you can update it to latest OS using the Below Instructions. Here we Share PD1803BF_EX_A_1.19.2 Firmware update For Vivo Y83 with update Instructions.
PD1803BF_EX_A_1.19.2 Firmware update For the Vivo Y83 Come with Latest Google Security Patches as Well as Some Minor Improvement’s.
Vivo Y83 Smartphone is Run on android 8.1 OS Which is Powered by a Mediatek MT6762 Processor. it is a dual SIM (GSM and GSM) smartphone that accepts Nano-SIM and Nano-SIM. Connectivity options include Wi-Fi, GPS, Bluetooth, USB OTG, FM, 3G.
the Vivo Y83 Smartphone is Come with 4GB of RAM and 32/64GB of Storage can be expandable via SD card. In Camera Department it Come with 13MP Rear Camera With 8MP Front Shooter.
Note-
1. Flashing the ROM Will Erase all Your Personal Data including Storage. So we advice You to First take a Complete backup of your Phone.
2. Please Do carefully, We are Not Responsible for any Damage to Your Device.
3. Must backup NVRAM using this Guide before Doing anything.
4. Ensure that Your Device at-least 50% Charge During Flashing Process to Prevent accidental Shut Down.
Must Require:
1. backup NVRAM
2. Create a nandroid backup
3. backup Your Personal data
Firmware information:
Product name: Vivo Y83
Type: OTA
Size: up to 2GB
SoC: Mediatek MT6762
Os: Android 8.XX
Password: Null
Root access: Not
Gapps: Included
Product Version: PD1803BF_EX_A_1.19.2
Download :
- Firmware PD1803BF_EX_A_1.19.2: Download
How to Install PD1803BF_EX_A_1.19.2 update on Vivo Y83:
- Download Firmware update Package From above and Move it to Device Storage.
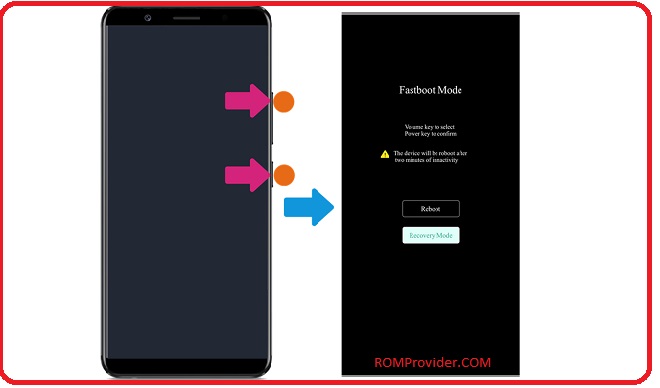
- Now Switch Off Phone and together Press Power and Volume up Button until Vivo Logo appear then Release Your Phone booted in fastboot mod Now Select Recovery mod.
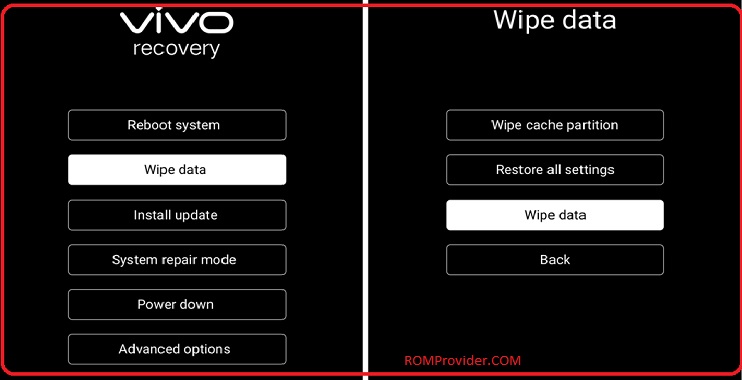
- Your Phone booted in Recovery. Click Wipe Data and Wipe all Data
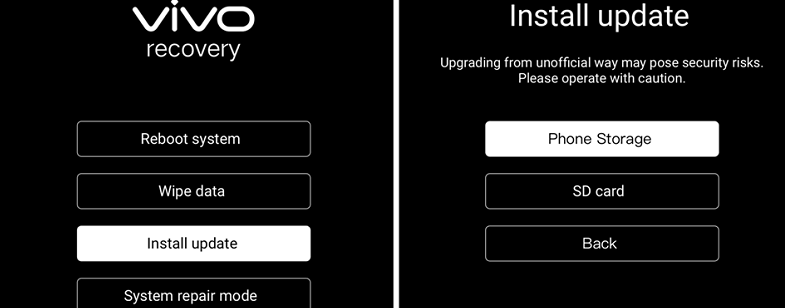
- Now Select Install update and then Locate Downloaded Firmware File From Storage.
- Click Install. wait until Success. then Reboot System Now.


