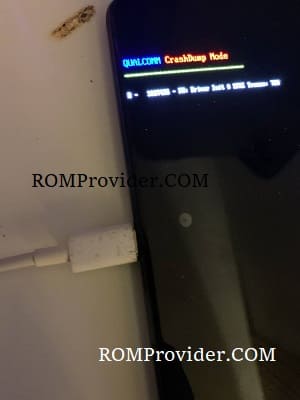
Qualcomm CrashDump Mode is a condition that can be encountered by users of Qualcomm powered devices when they find themselves stuck in a boot loop, with an error message indicating the presence of the CrashDump Mode.
In this blog post, we will delve into the possible causes of the Qualcomm CrashDump Mode, explore troubleshooting steps, and offer insights into preventing such issues in the future.
Causes of Qualcomm CrashDump Mode:
- Software Glitches:
- Firmware or software glitches can lead to the device getting stuck in a boot loop. This might be caused by incompatible corrupted system files, or incomplete software updates.
- Hardware Issues:
- Malfunctions in the device’s hardware components, such as the processor or memory, can trigger the CrashDump Mode. Overheating or physical damage may contribute to hardware-related problems.
- Rooting or Modding:
- Users who have rooted or modified their devices may encounter the CrashDump Mode more frequently. Unauthorized system modifications can destabilize the device’s functionality.
How to Fix Qualcomm CrashDump Mode:
Reflashing the correct firmware using QFIL (Qualcomm Flash Image Loader) can be a potential solution to fix issues related to Qualcomm CrashDump Mode.
Prerequisites:
- Download Correct Firmware:
- Download latest edl repair file for ROG 6 (Contact Me for paid support)
- or you can use this file
- Install QFIL:
- Download and install Qualcomm Flash Image Loader (QFIL) on your computer.
Steps to Reflash Firmware using QFIL:
- Prepare Your Device:
- Ensure your Qualcomm device has sufficient battery life to avoid interruptions during the flashing process.
- Boot into EDL Mode & Connect Device:
- Power off your device and boot it into EDL Mode by holding volume up & down button + USB, if the method not work then you have to short test point
- Launch QFIL:
- Open QFIL on your computer.
- Load Firmware:
- In QFIL, click on “Browse” and select the firmware or rawprogram_unsparse.xml file from the firmware package you downloaded.
- In QFIL, click on “Browse” and select the firmware or rawprogram_unsparse.xml file from the firmware package you downloaded.
- Configure QFIL:
- Configure QFIL with the appropriate settings. This includes selecting the correct programmer and configuring other options.
- Start Flashing:
- Once everything is set up, click on “Download” in QFIL to start the flashing process.
- Once everything is set up, click on “Download” in QFIL to start the flashing process.
- Wait for Completion:
- Allow the flashing process to complete. This may take some time. Do not disconnect the device during this process.
- Completion Message:
- Once the process is complete, you should see a “Download Succeed” or similar message in QFIL.
- Reboot Device:
- Disconnect your device from the computer and reboot it.


