
Rooting a OnePlus phone has always been fairly straightforward, but recent Android updates have changed the process slightly. Some models now use an init_boot partition instead of the traditional boot.img. If you’re planning to root your device with Magisk, you’ll need to know which partition your phone uses, grab the correct firmware, and then patch the right image.
Here’s a simple, no-nonsense guide that works across most modern OnePlus devices.
What You’ll Need
-
A OnePlus phone with the bootloader unlocked
-
A PC with ADB and Fastboot installed
-
The Magisk app installed on your phone
-
The full firmware package for your exact device version (to get
boot.imgorinit_boot.img)
Step 1: Check if Your Device Uses init_boot Partition
-
Connect your phone to the PC and boot into fastboot:
-
On the PC, run:
-
If you see an
init_bootpartition, that’s the file you’ll need.
If not, stick withboot.img.
Step 2: Get the Correct Image
Download the firmware that matches your phone’s current version. If the firmware version is different, flash the matching firmware first—root will only work if the patched image is from the same build.
-
Extract
boot.imgorinit_boot.imgfrom the firmware package.
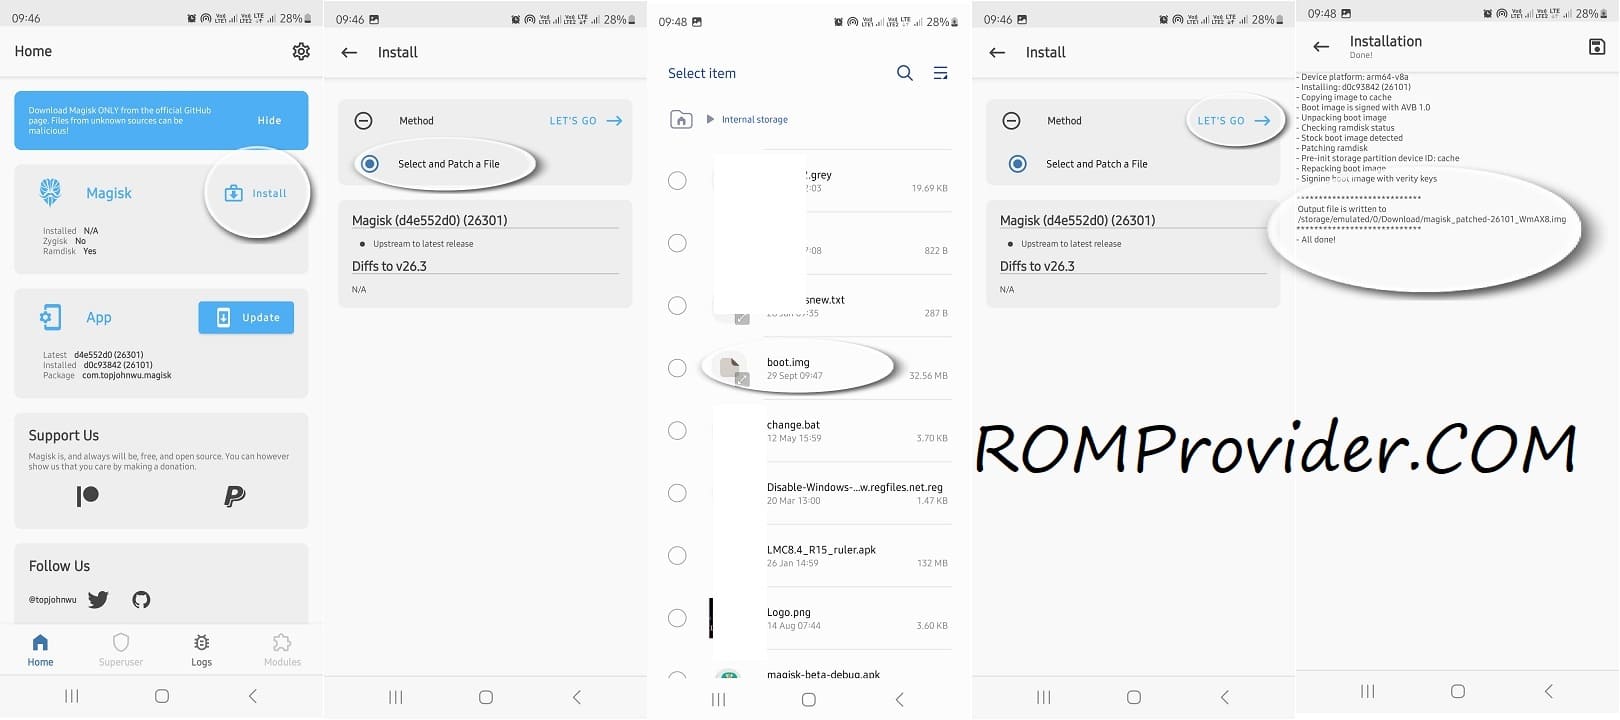
Step 3: Patch with Magisk
-
Copy the image file (
boot.imgorinit_boot.img) to your phone. -
Open Magisk → Install → Select and Patch a File.
-
Choose the image. Magisk will save a patched copy in your Downloads folder.
Step 4: Flash the Patched Image
-
Reboot your phone back into fastboot:
-
Flash the patched file:
-
For devices with
init_boot: -
For devices with
boot.img:
-
-
Reboot:
Step 5: Confirm Root
Once your phone boots, open Magisk. If everything went well, you should see that root access is active. You can double-check with apps like Root Checker.