
Reset FRP bypass Google Account Umidigi S3 Pro:
if you own Umidigi S3 Pro Smartphone having FRP issue then you are on a Correct Place. Here we Share a Step by Step Guide to Remove or reset FRP on Umidigi S3 Pro.
The Umidigi S3 Pro Smartphone is Run on android 9.0 OS Which is Powered by a Mediatek MT6771 Processor. it is a Dual SIM Smartphone Support WIFI GPS Bluetooth & hotspot Connectivity.
The Umidigi S3 Pro is come with 6GB of RAM and 128GB of Internal Storage Can be expandable via SD card.
What is FRP/Factory Reset Protection:
Factory Reset Protection (FRP), is a security feature on Android devices with Lollipop 5.1 and higher. FRP is automatically activated when you set up a Google™ Account on Your device. Once FRP is activated, it prevents use of a device after a factory data reset, until you log in using a Google username.
Requirements:
- SP Flash tools Here
- Scatter File From Firmware Umidigi S3 Pro Here
- basic Knowledge PC and usb
- if fail use Custom Da File Here
Must Require:
1. backup NVRAM
2. backup Your Personal data
3. Create a nandroid backup
Note: if You fail with below Method You can try This another Method Here
How to Reset FRP on Umidigi S3 Pro:
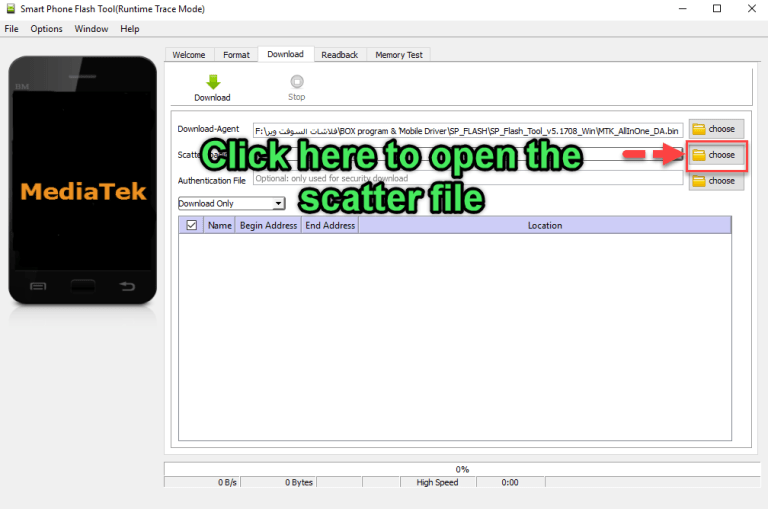
1. Run SP flash tools and Click Choose to open Scatter file.
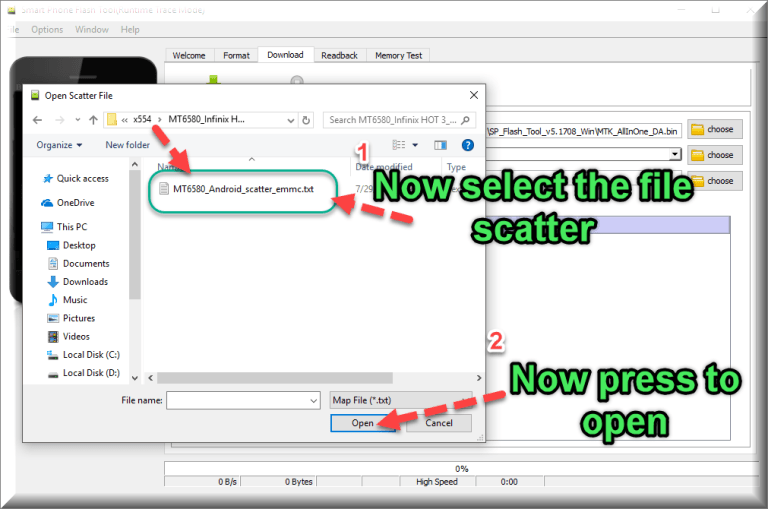
2. Select the scatter file and click open.
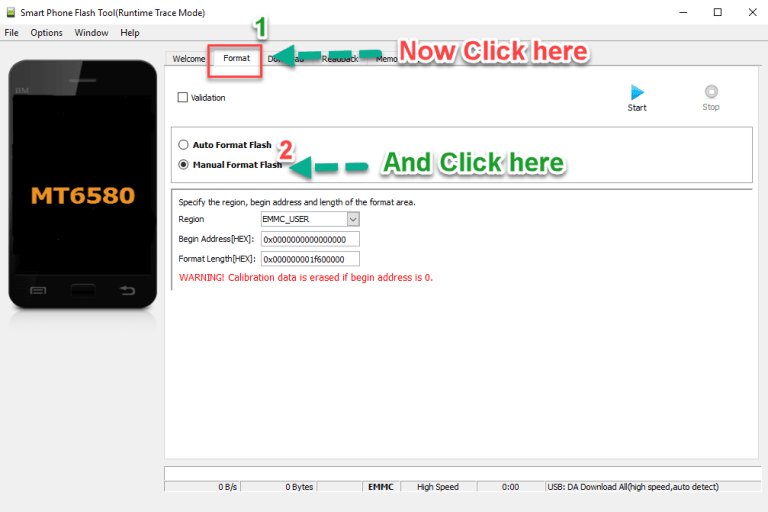
3. Select format menu and mark manual format flash.
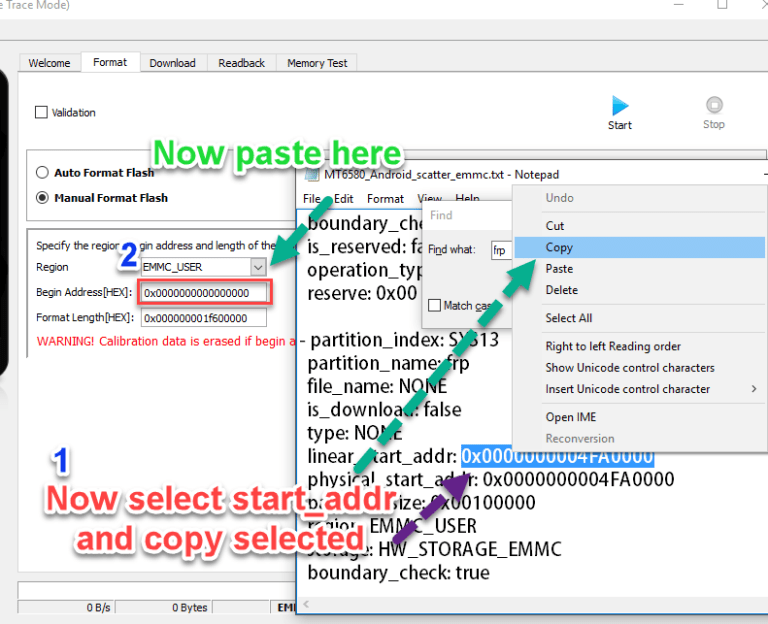
4. Open Your scatter File with Notepad.
5. Press CTRL + F on your keyboard And type FRP.
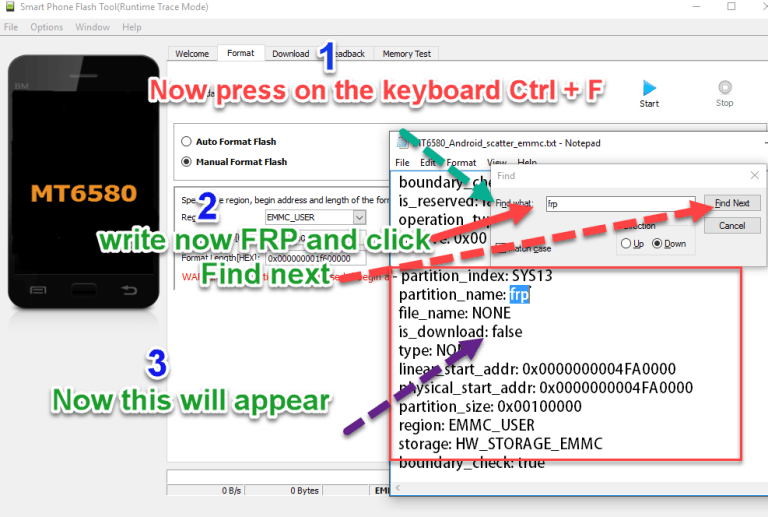
6. Copy and past address as you see in the image.
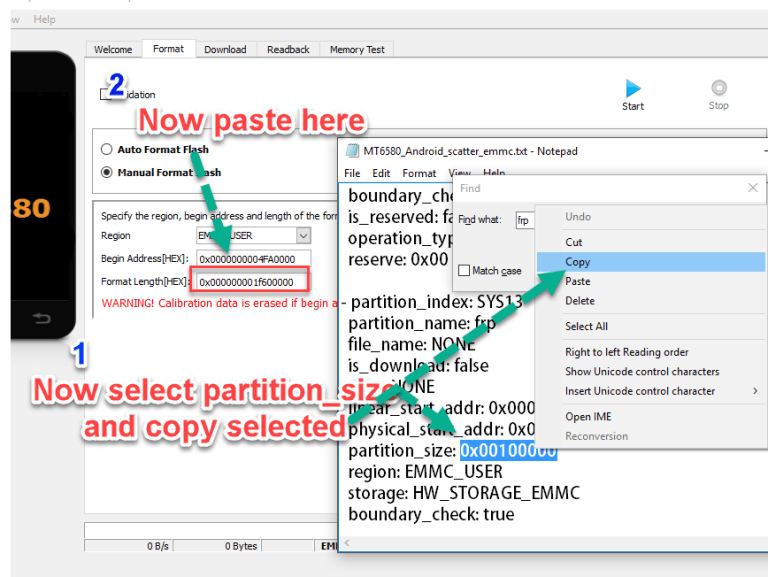
7. Copy and past partition size.
8. Click start.
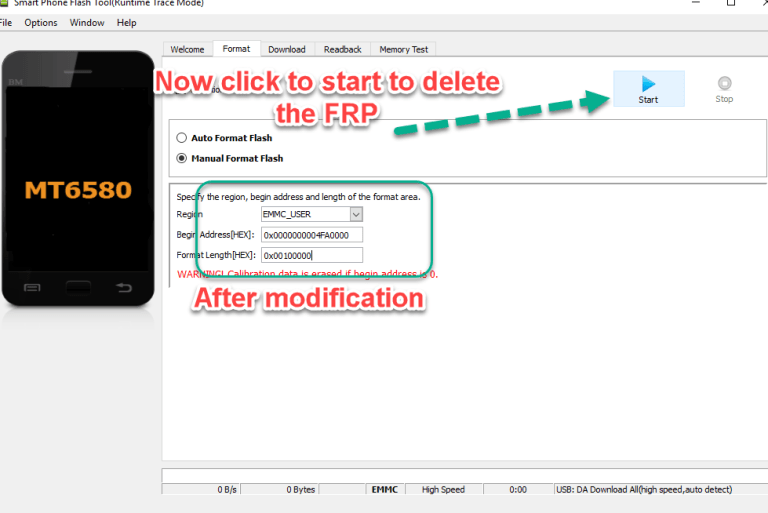
9. Connect Your Switch phone and wait.
10. Done FRP Reset Successfully, Disconnect to Switch on Phone.