using Aperture on pic’s art:
Controlling the aperture is one of the Most Powerful ways to improve your images. It’s also the topic that continues to perplex photography students everywhere. Rather than unnecessarily complicating matters, I prefer to demystify the subject. In this tutorial, I’ll reveal How a wide aperture can be used to create artistic effects. The camera settings are listed below each photo for your reference.
Example 1: Butterfly – 100mm lens at f5.6, 1/3200, ISO 800;
When I’m about to take a photo, the first question I ask myself is, “what kind of background would be best?” With wildlife, sports, portraits, and still-life objects, I often want the subject sharp, and the background to be a soft blur. As you’ll see in Example 1, the blurred background allows the viewer to focus on the beautiful details of the Butterfly, not on the leaves behind it. To do this, I chose a wide aperture by adjusting the f stop to a smaller F number. At f5.6the opening in your lens is physically wide open, creating what’s known as “shallow depth of field”.

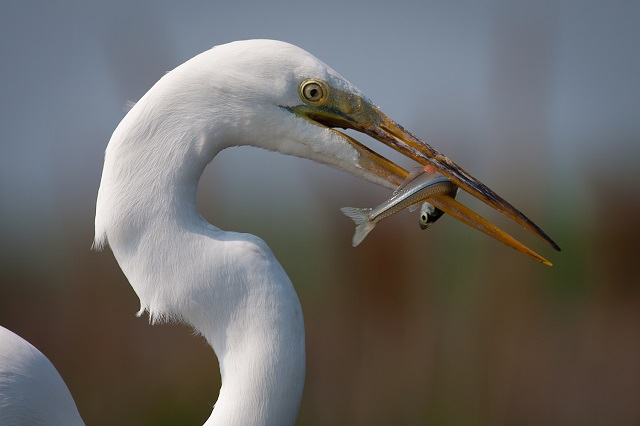
Example 2: Egret – 400mm lens at f5.6, 1/1000, ISO 100:
In Example 2, I photographed a Great Egret at f5.6. The bird is tack sharp while the foliage in the distance is very soft. The theme of the photo is clearly about the bird and its catch, and there is little else in the photo to detract from the powerful moment. For this reason, wildlife photographers typically use wide apertures for the majority of their work. To further emphasize the effect, try positioning yourself so there is distance between the subject and the background.
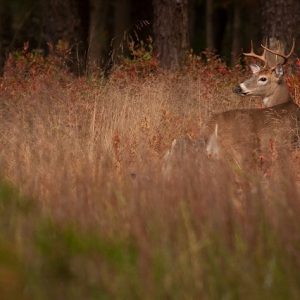
Example 3: Male Buck – 400mm lens at f5.6, 1/500, ISO 800
We can see how all of this comes together in Example 5 of the Male Buck. I saw the large Deer in October just after sunrise. With my active focus point on his face, I knew the deer would be sharp. A wide aperture of 5.6 created a shallow depth of field. Not only was the background blurred, but the tall reeds in the foreground as well. The perspective makes it seem as if we’re spying on the creature through the tall grasses.
Related articles:
1. Understanding Layer on Kinemaster Pro
2. How to Download all item for free on Pics art
3. [Guide] How to Remove Water Mark of Kinemaster Pro
4. [Guide] How to Remove/Change Video Background on Kinemaster Pro