
Build a Pre Rooted Patched boot.img:
Step by Step Guide to Create a Pre Rooted Patched boot.img using the Magisk Manager. by Using the Patched boot.img You can Root Your Phone Without using the twrp Recovery.
Note:
- Unlocking The bootloader Will Erase all Your Data.
- Make a Backup Before Process. It Will help You to Restore Your Phone.
- Charge Your Phone at least 50% to Prevent Shut Down During the Process.
Downloads:
Process:
- Download & Install Magisk Manager on Phone From Here
- Download Firmware For Your Phone and Move boot.img File from PC to Phone From Here
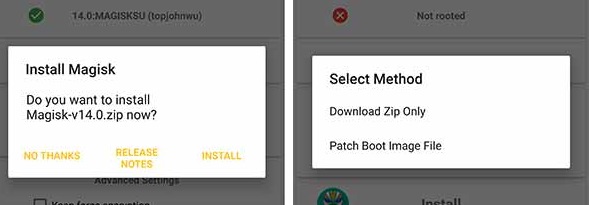
- Run Magisk Manager Click update Magisk and Select patch boot.img Now Navigate boot.img File
- Wait until Magisk Patch it. Now Patched boot.img is Placed in Storage/Magisk Folder if Not Then Storage/Download Folder.
- Now Move Patched boot.img File From phone to PC.
- Download & Extract Platform tools inside a Folder. Now Move Patched boot.img File to Platform tool Folder
- On Phone Enable usb Debugging and oem unlock From the Developers options.
- Now Connect Phone to PC with usb. Make Sure all Driver Installed properly
- Open CMD in Platform tool folder. then use below Code to Perform target action.
Reboot Phone in bootloader using below code:
adb reboot bootloader
Now unlock bootloader using below code:
fastboot oem unlock
if fail use this one
fastboot flashing unlock
Now Flash patched boot.img
fastboot flash boot patched_boot.img
Then Reboot system with below code
fastboot reboot
Now Install Magisk Manager to operate Root Permission. Done Your Phone Now Rooted.
Help! I use Itel p33 plus
fastboot oem unlock (failed)
fastboot flashing unlock (not implemet)
it run on spreadtrum Soc try,
fastboot flash boot magisk_patched.imgmagisk_patched.img is file name patched with magiskMy oppo realme 1 coloros 6 fail after replace patched boot file
unlock bootloader and flash with the code:
fastboot flash boot "File_name"